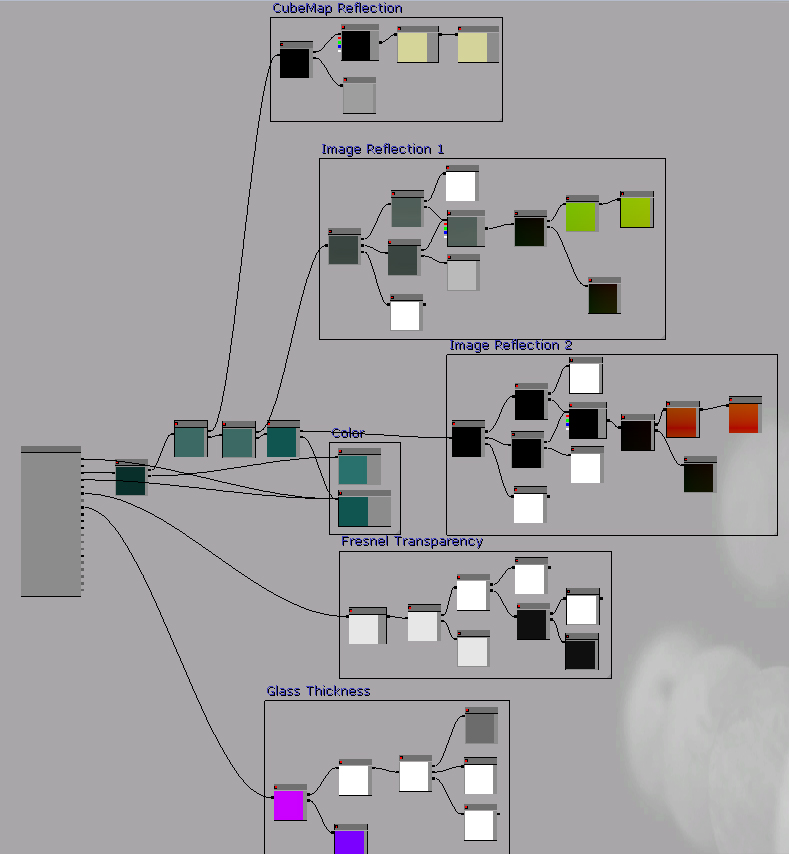

This glass shader consists of 6 main elements, half of which are reflections. The other three consist of transparency, distortion, and color.
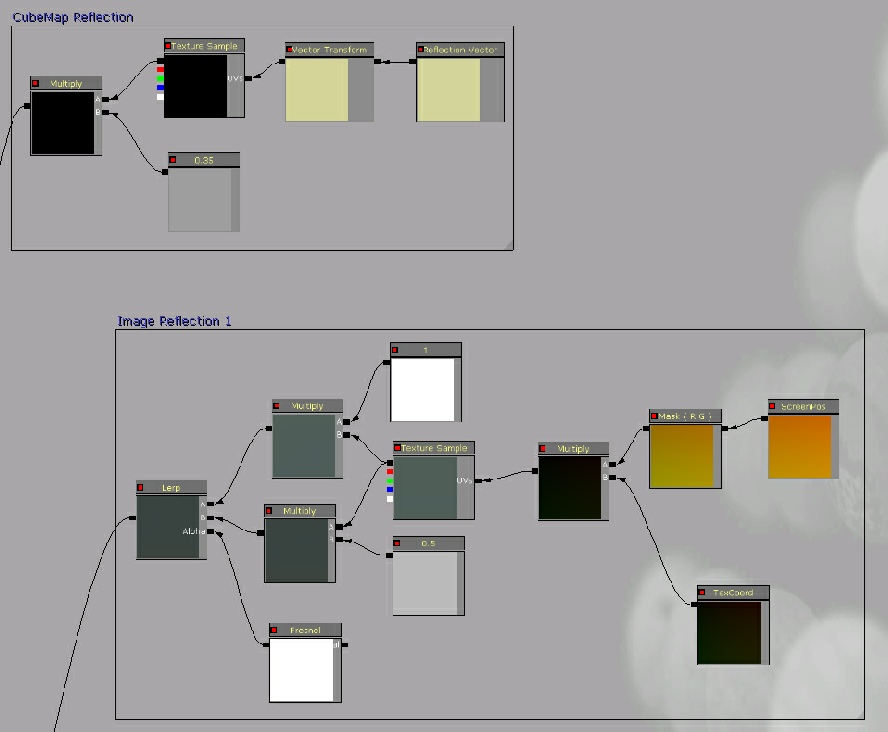
Let’s start with the reflections. In the top-

The image-
That all plugs into the image you want to be reflected. In this case I used my floor texture, to add some color and noise to the reflection. The texture is then multiplied by 2 separate numbers, these are free to change based on how you want the reflection to appear. The results are entered into a Linear Interpolate node whose alpha is a Fresnel whose exponent is set to 2.5.
The second image reflection is the same as the first, but with an image to create the illusion of reflected lights. The color is controlled with two Constant Vector 3 nodes, one a little lighter than the other. The first is set to .017, .169, .151, the second is set to .023, .088, .078.
The second color node is added to the second Image Reflection, as well as the diffuse. The Add node is then added to the first Image Reflection, which is then added to the Cube Map reflection. The result is multiplied by the first color to bring the value up a bit. Then plugged in to the emissive channel.
The first color is also the Specular Color.


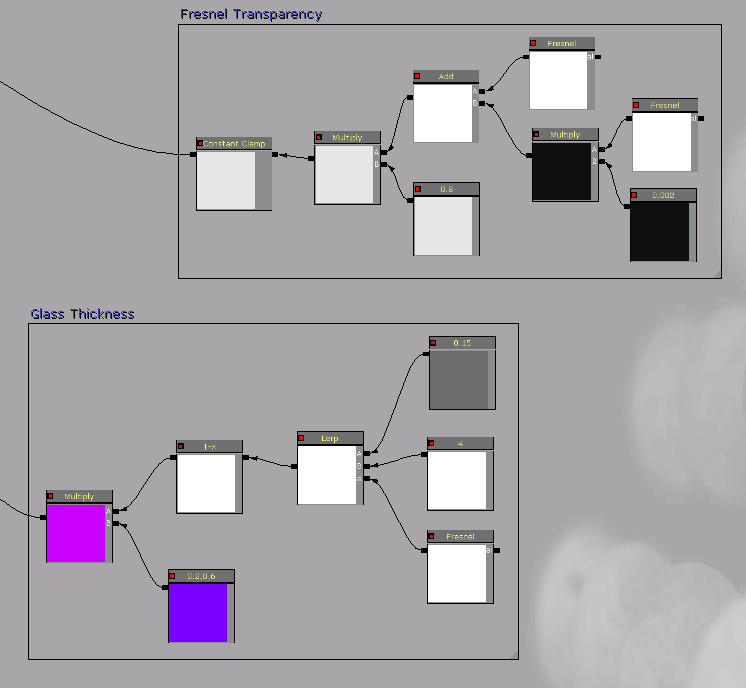
The transparency starts with a Fresnel node, exponent 2 multiplied by .002. This is added to another Fresnel node, exponent 4. The result is multiplied by .8 to make the overall transparency a just a bit lower. That is then entered into a Constant Clamp node with min set to .125 to keep the most transparent spots from becoming invisible.
The distortion channel makes the glass look like it has some thickness. This is started with a Lerp node with .15 in A, 4 in B, and a Fresnel with exponent 3 in the alpha. This is then inverted with the OneMinus node. Multiply all that by a Vector Constant 3 set to .2, 0, 6. This emulates a flat, but elevated Normal Map, creating a slight light refraction.